Showing posts with label DIY. Show all posts

Saturday, 15 April 2017

Salted Caramel Easter Nests

If you're anything like me, the phrase 'salted caramel' will instantaneously make you salivate.

So I had an idea to shake up the old classic cornflake nest and make these for Easter... My 3 year old helped me so these are great to make with kids!

Although, I tried to melt down Cadbury's caramel bars the first time I tried this, apparently they don't melt easily, who knew?!? (I'm guessing its because the sugar has a much higher melting point than the chocolate)


You will need: (Makes 12)

200g of pretzel sticks
250g plain chocolate
100g caramel chocolate bars (although I think caramel or fudge bits would work perfectly)
150g mini eggs

100g white chocolate (optional)

  • Break up your chocolate into a bowl. Cut the caramel bar (I used Cadburys Caramel for mine) into small pieces
  • Create a bain marie with a heatproof bowl over a pan of boiling water, melt your chocolate.
  • Once the chocolate has melted, stir in your caramel pieces.
  • Break up your pretzel sticks and stir through the chocolate until melted.
  • Spoon the chocolate and pretzel mix onto greaseproof paper, making nest shapes as you go.(You could also put them into cupcake cases)
  • Place mini eggs on top of the nests whilst chocolate is still wet.
  • I chose to drizzle white chocolate and sprinkles over mine to make them a bit more decorative, however, this is completely up to you as they look good without too!
  • Leave them to set, then enjoy!


Please be kind, this was the first time I've ever shared a recipe, as easy as it is!


Hope you enjoy, and let me know how you get on,

Thanks for stopping by,

Charlotte
x


Sunday, 11 October 2015

Vintage Lace Doily Dream Catcher DIY

I'm all swept up at the moment in a house move that has come to a stand still, however, that can't stop me from planning for the new look of the new house. 

Dream catchers seem to be a big thing at the moment and I've been dying to make one for little Elsie's room, so here is my version in a nice DIY blog... Although, I'm so pleased with the results I may just have to keep this for myself! 

I think this would make a fabulous gift, a lovely Christmas decoration, or be perfect for a wedding... The possibilities are endless. 


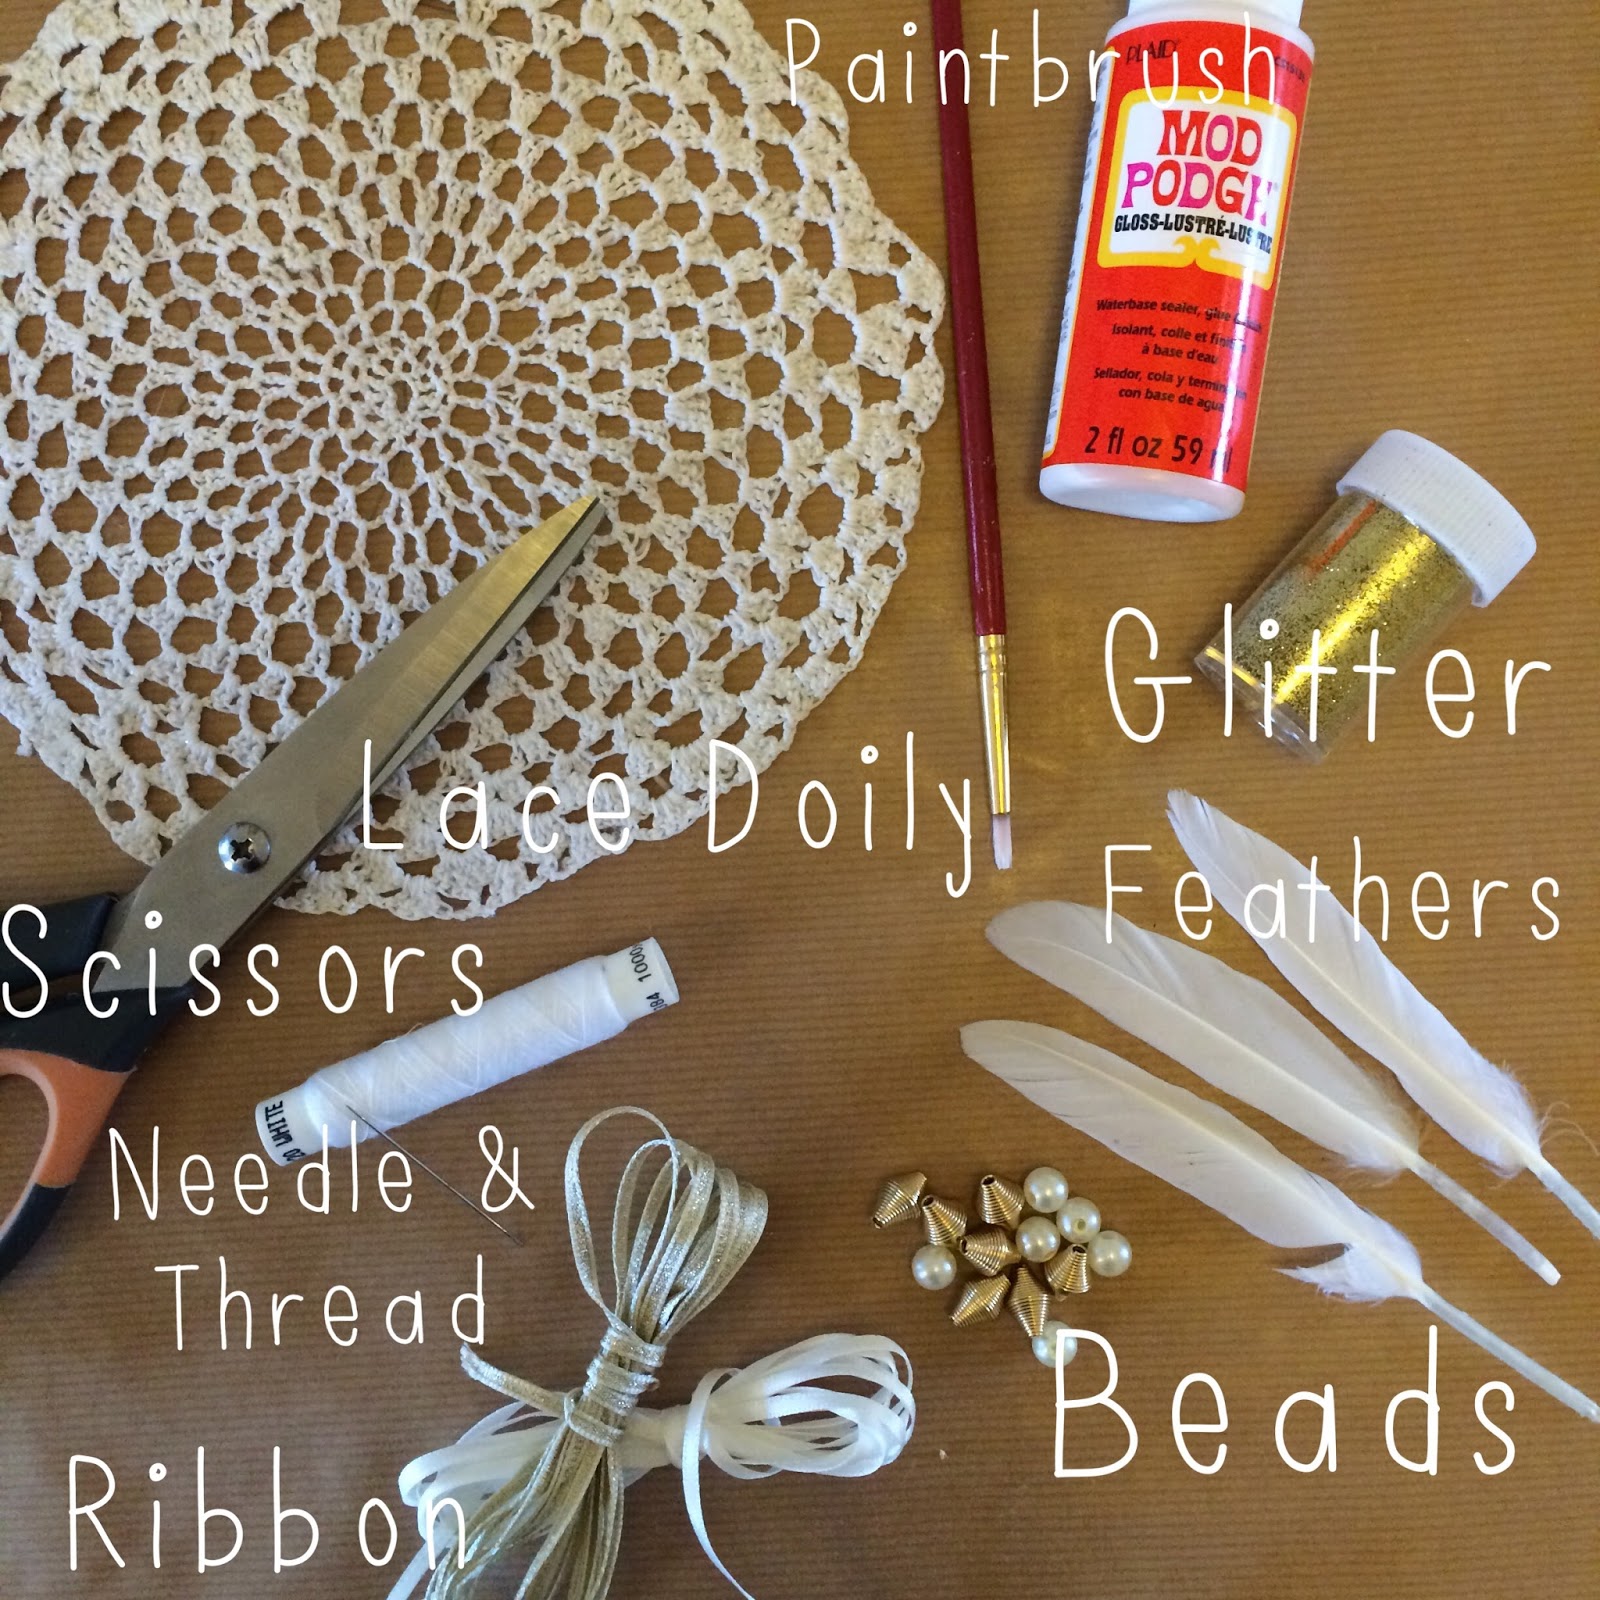
So here's what you'll need. 
(I picked my doily up from a vintage fair a while back, and the rest of my
 supplies came from Hobbycraft)


The first step is super easy, but takes some waiting for the glue to dry, 
simply paint the mod podge onto one side of the doily. 
Once dry, repeat on the other side.
After each coat ensure the doily is sat 
in the shape you want it to be at the end as this will fix the shape.


(you could dip the doily into mod podge to speed up the process, however I was wary that this may lead to the it pooling between the doily holes which I wanted to avoid.) 

On the second coat, I also took the opportunity to 'glitter dip' the feathers. 
Simply paint your feathers with mod podge and dip them into the pot of glitter. 
You may wish to try filling a dish with glitter and lying the feathers flat into this if you don't want the feathers to split. 


Once everything is dry you are now ready to assemble. 
Find the centre point at the top of the doily and feed your ribbon through to the back, then secure it using a needle and thread. 
You could tie a knot here, but I do like that the stitch keeps the ribbon flat and more control over the way the ribbon hangs. 


At this point I decide that the doily might need sprucing up a bit, I did consider adding beads, but I had the glitter and the mod lodge out so thought I may as well make the most of the mess! I just pasted the edges, before carefully sprinkling glitter over the top. 


Now cut your ribbons to the size you want. Remember, you can always shorten if needed later, but you can make them longer, so if you're not sure, go a little longer, then take away. 

I then trimmed all my feather 'stems' to an even size and filled them with mod podge before inserting the ribbon side the stem. Again, I was trying to avoid knots here. 
I decided to add beads to the top of the feathers for a nicer finish.


I then tied a knot at the same point of each of the feather ribbons and added another gold bead for extra detail. 


The other ribbons were super easy, I just tied a knot in the end and threaded beads on. 


You should now have all these parts ready to assemble...


Using the same method as for the ribbon loop, feed the ribbon through the doily holes to the back and again, secure into place using a stitch. 
Make sure your ribbons all fall to even lengths, not only for aesthetics, but also for balance. 


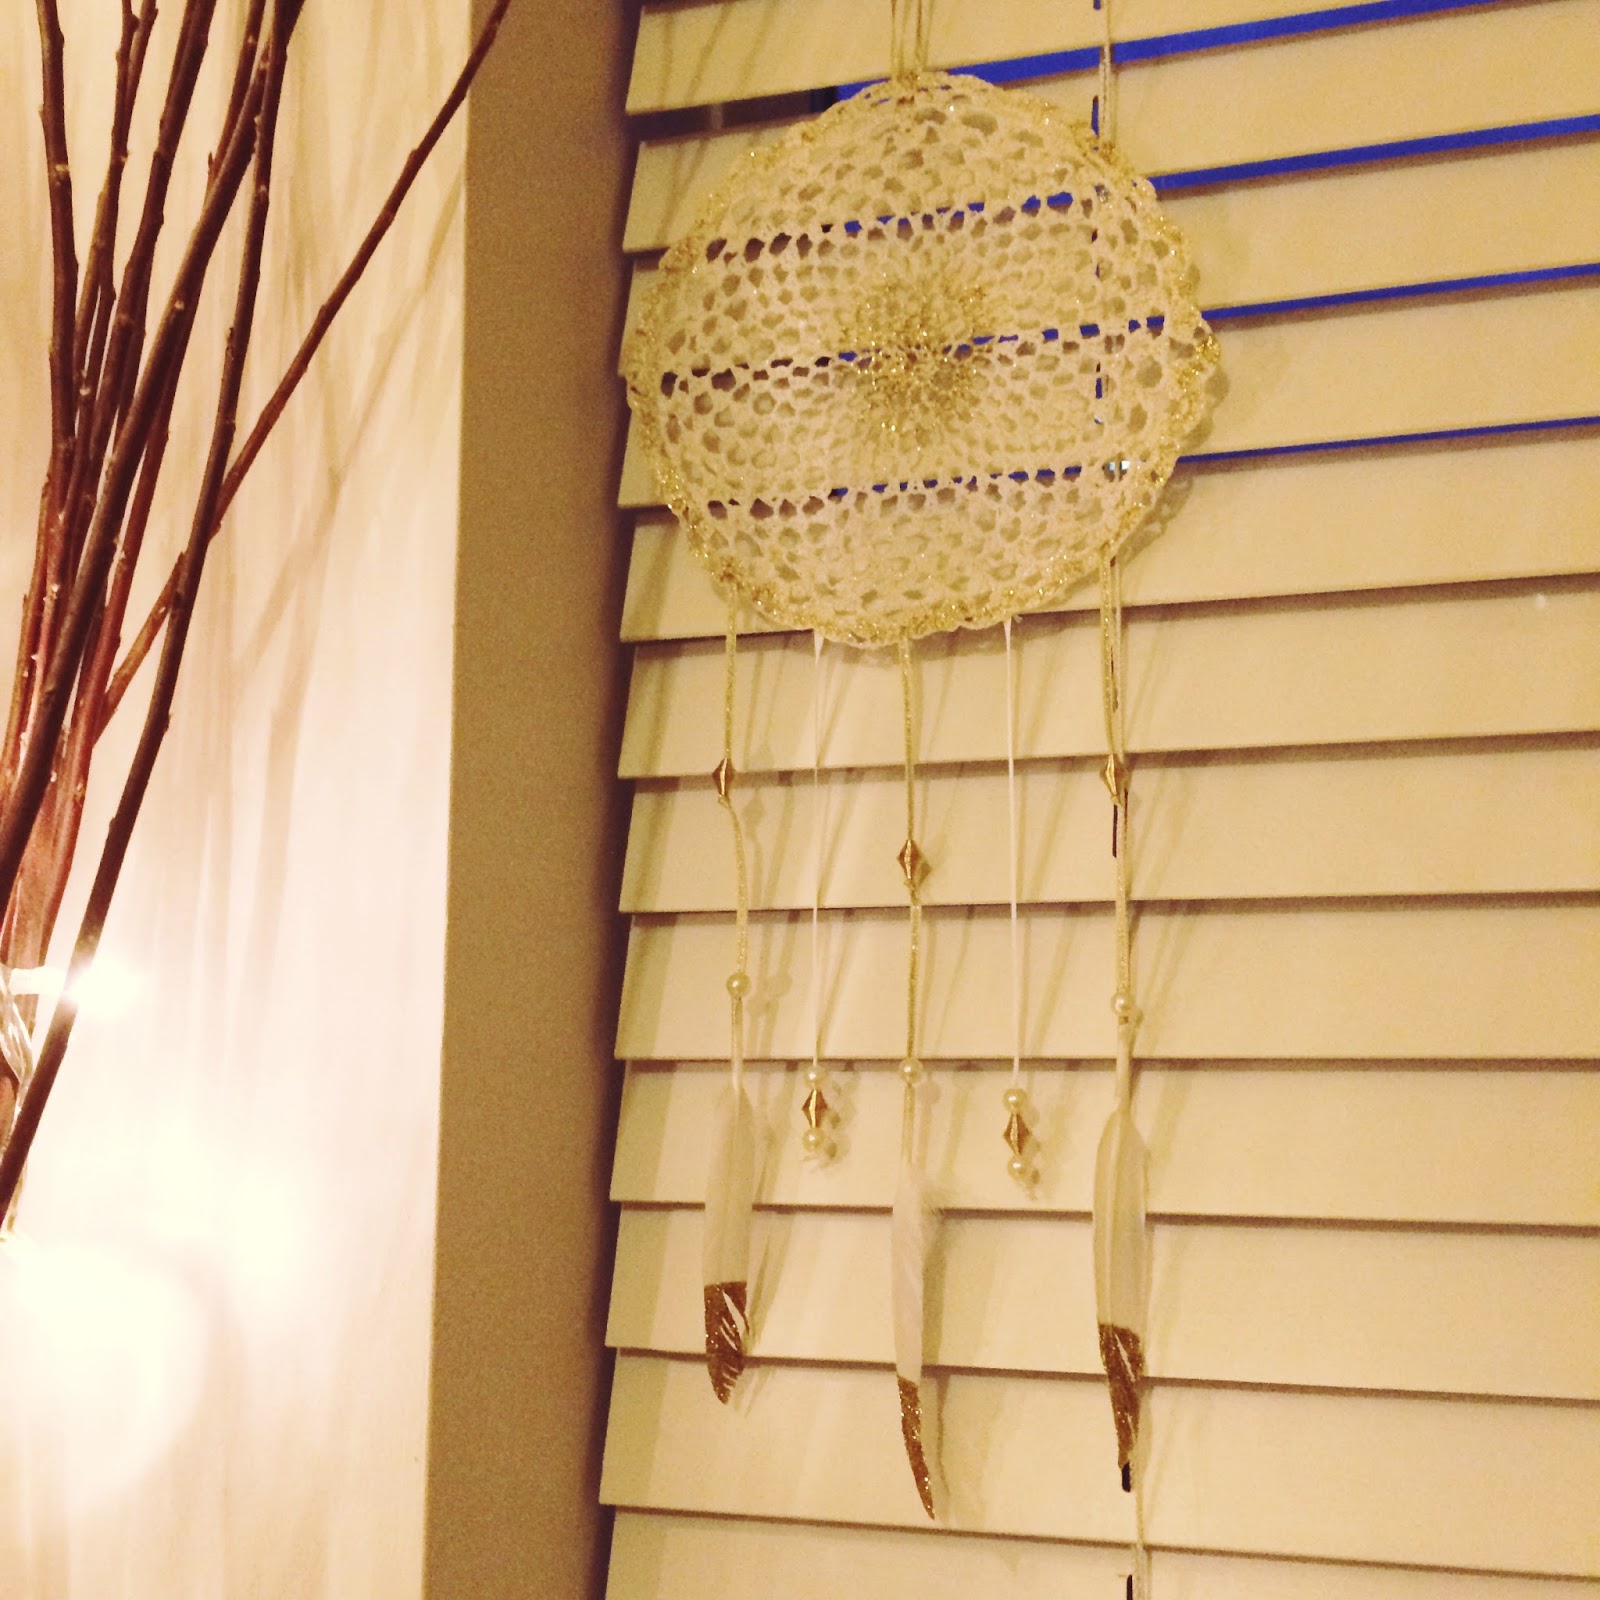
And thats it, simple, yet gorgeous! I think you could have some real fun with this, I may steal this one for me, but make a fun hot pink one next for my little lady! 


Hope you enjoy, and I'd love to see if you have a go. 
Instagrammers, hashtag #windupdream or please tag me in your creations, I would love it! 


Thanks for stopping by, 


Charlotte 
xx

Now if you'll excuse me, I've some glitter to clean up!

Sunday, 27 September 2015

IN CASE OF EMERGENCY... Make this gift...

Christmas is coming, and that can only mean one thing! Time to start preparing, the first thing I aways begin with are the presents. I'm one of those people who loves spending time making or searching for the perfect gift, yet occasionally theres always that one that catches you out, usually the Secret Santa at school or the kids teachers. 


Well this year, I've a solution with this super easy DIY gift, a fire alarm inspired treat frame...


The supplies you will need...


The small box frame was purchased from The Range, but I have seen them in other craft stores like Hobbycraft for example. 


I'm a stickler for spray paint as I finds it gives the best finish but really you could use any type of red paint. Unfortunately the glass doesn't come out of these frames, so some masking tape was needed to protect the surface. 

Once the paint is dry, then comes the super easy part...


 Use a DYMO label maker, or similar, to stamp out your message...
'IN CASE OF EMERGENCY, BREAK GLASS'. 


Trim down some pretty craft paper, I used some from a Belle and Boo packet, also 
purchased from The Range. 


then assemble... 


Treats inside, so I chose a tea bag and coffee sachet, my own personal weakness, but you could use anything you know is a weakness! I guess that depends on how well you know your recipient! 


Stick your labels onto the glass and you are done! 


 As always, I'd love to see what you put in your 'emergency boxes' if you have a go! 

Have fun, and if you are a fellow Instagrammer, use the hashtag #windupemergency. 

Thanks for stopping by, 

Charlotte

xx


Sunday, 13 September 2015

Keep Calm, Cross Stitch and Say 'I Do' DIY

Ok, if you think this post has a little deja-yu vibe to it, that's because I've lifted it from my old blog (I'm planning to move everything over one day and delete the rest...) I was inspired to choose this one today as we had a fabulous time at a friends wedding yesterday, it was pretty magical! 

The main difference is, that this time I've created the pattern for you, you'll find an extra large photo at the end of the post. 

So, anyway, keep calm...


The hardest thing about being a creative with creative friends can be when it comes to present giving. Not because they're hard to buy for, but because they always give lovely handmade gifts, to which I cannot possibly respond with something from a store; no matter how well intentioned.

For this reason I store every idea for when it is most needed. So when I received this free chart from 'Cross Stitcher' magazine at the Clothes Show, I knew I was saving it for a gift, and I knew who for...


So I used the pattern for the crown, although I needed to make mine smaller so edited it a little. I also missed out the backstitch.


I then, in my mission to shrink it down, made the words up as I went along, shrinking each letter...


Whilst I recorded the process on instagram, I was mildly tempted to take one followers advice to 
"Leave it. The suspense will infuriate OCDists"
But, it IS a present... so I couldn't, however I do intend to bank that idea for later! 


It was indeed a gift for a bride to be... 


...Once framed, the perfect keepsake of her special day! 

I love being a creative type.


Hope you enjoy, as always, I'd love to see your results if you have a go, 


Thanks for stopping by, 


Charlotte

xx 


(Apologies, I just realised, I've only left 1 line blank between the crown 
and the 'keep', in the original I left 3)


Sunday, 21 June 2015

Happy Fathers Day - Reclaimed Beer Carrier

Happy Father's Day to all those Daddy's out there! 

It's the second time we've celebrated Fathers day in our home, last year was a bit of a fail on my part however. I'd not long returned to full time work, juggling that and a 7 month old was hard going, a bottle of beer and the Peppa Pig book 'My Daddy' was about all I could manage. So this year I had to make up for it! 

So I thought it was about time for a little DIY, this one however, is definitely not for kids. 

If there's one thing my husband appreciates, its good beer, so I decided to get him some nice beers and thought I'd laser him a little slot together beer carrier using the laser cutter, this would also allow me to personalise a nice little message for him. 

That was until I came across this great little tutorial for Wedding Beer Totes on The New Hobbyist Blog, I was totally smitten with the idea of the tote with a bottle opener on the end so began to look for some salvageable pieces of wood to use at work. 


After a good rummage I found a beautiful piece of beech that had been removed from one of the school workbenches, it was great, covered with small drill holes and lots of paint and glue splats from over the years. Sold. I hadn't yet fully decided about the handle but had a lovely old ruler to use for the side panels, we've no need for inches anymore, with these, I was almost ready to go. 


I also loved that the ruler was from Birmingham, it's our city, or at least the closest to us, and where my husband was born.


I also searched for a wall mounted bottle opener on eBay, there was lots of choice but I just opted for cheap, cheerful and quick delivery. 


The next job was to find something for the handle, I had considered an old broom handle, but wasn't sure about how well it would hold up, fortunately we had lots of old metal tube I was able to use, so using a hacksaw I chopped it to size. I considered just bashing the handle to deform it, this would work but I wasn't sure how I'd get it into both ends of the carrier, so my colleague and I came up with a nifty technique (sorry I don't know the proper name for this technique, I'm out of my comfort zone!) but we sawed a small section from the centre of the tube on each end and hammered in a small piece of thin ply, this secured it nicely and added to the overall industrial appearance.


You may have noticed I decided against the sections to separate the bottles, I may come back to this and create some removable sections, but of now I decided to leave it as beer bottles come in so many different shapes and sizes and also, this way there was room for snacks! 


Only thing left was to fill it with some tasty beers and some suitable snacks, beef jerky and peanuts, I also got him some pork scratchings too but couldn't quite squeeze them in. 


Hope you all like my efforts, I'm pretty pleased with how it turned out and thank you to The New Hobbyist for such a fab tutorial, I bet his groomsmen loved them as much as my husband! I'm just sorry I didn't take more photos! 


Thanks for stopping by, 

Charlotte


Sunday, 10 May 2015

Incy Wincy Spider DIY


Incy Wincy Spider climbed up the water spout, 
Down came the rain and washed poor Incy out, 
Out came the sunshine, 
and dried up all the rain... 
So Incy Wincy Spider climbed up the spout again!


Like any child, my daughter loves Nursery Rhymes, so I decided to make her, her own little Incy Wincy to sing along with, she loved him! (And I love making pompoms, so everyone is a winner!) 


This is a fairly easy DIY, even for little hands, but some of the stages will need carful adult supervision, and I will suggest some changes along the way if you want your little ones to do the crafting. 
So, heres what you'll need... 


I used the A Beautiful Mess App to add the writing


First up is the spider himself, for this I used a pom-pom maker bought from a now defunct online store, these are quite easy to get hold of now and most craft stores stock them in a variety of sizes. 

If you don't have or want to invest in a pom-pom maker, (perhaps you aren't as enthusiastic about pom-poms as me) you could always do it the old fashioned way using two cardboard circles, theres a great Instructables tutorial for this here


Once you've tied your pom-pom off, give him a haircut, use the scissors to trim off any    
                long ends of yarn so he looks nice and smart for his performance! 
           Do make sure you leave a nice long length of yarn attached to it though. 


Then it's time to add the legs, push the 4 pipe cleaners through the pom-pom body to make your spider. (In hindsight I thought that it may be better to pop your legs through the pom-pom maker/carboard rings before you tie it, but it will work either way) 

Take care to travel through the loop of yarn holding the pom-pom together, and don't worry if                   some yarn gets pushed out, it wont matter too much.


Now bend your spiders legs into the desired shape. I put an extra bend in mine as I thought it was cute, but be warned, this can catch a little on the bottom of the spout preventing the overall effectiveness. 

Do remember though, pipe cleaners can be sharp!


All Incy needs now is a lovely pair of eyes, although my eyes already had sticky backs I felt it was better to glue them on, after all this is for use with a child and I didn't want a rogue eye floating around the house so I used my faithful glue gun to safely stick them into position. 

If a child is doing this though, I would recommend a PVA glue as hot glue guns can cause nasty burns.


And there you have it. 
Incy Wincy Spider... Pretty cute right? 


                     He's not complete yet though, he needs a spout to climb up!

For this stage you'll need straws, sellotape, scissors and an old cardboard box, or if you're feeling up to a trip to the shops a sheet of shiny silver card would be lovely! 

I however found a battered old cereal box for this post *blushes*... 


Start by sellotaping your straws together to create a 'U' shape


I used jumbo straws from JYSK

These will help you push Incy Wincy back down the spout when the rain comes along. 

Tidy up the edge of your cardboard if you need to using the scissors, this is definitely another adult assisted job. 

A great job for kids at this stage would be to add a little decoration to the spout, perhaps writing out the song or gluing down sequins, whatever they choose, its a great opportunity to get creative!


On the wrong side of the box (the side you don't want to see) sellotape one half of your straw 'U' down, making sure you leave enough room for Incy to be hidden beneath it. You can trim the top of this star to no sit flush with the top of the cardboard. 

The other half of there straw 'U' needs to be left free to move. 


Now curl your cardboard into a cylinder, I used my sellotape to 
help me get the correct shape


Once you're happy with the width of your cylinder and happy that Incy can sit 
comfortably within it, sellotape it into position. 


And, you're done! All thats left to do is feed the long length of yarn through the bottom of the 'spout' and get your singing voices ready! 


Hopefully you will get as many giggles from your little one as I did! 

When sing along, pull the yarn to guide inch up the spout, then push the straw down to 'wash' him back out. 

If you have a go at this, I'd love to see your attempts, if you're an instagram user, simply use the hashtag #windupincy 

You could also use Incy as a prop in other nursery rhymes, for instance...

Little Miss Muffet, sat on her tuffet, 
eating her curds and whey... 
Along came a spider, and sat down beside her, 
and frightened Miss Muffet away!

I'm pretty sure he'd be great fun at Halloween too.

Have fun! 

Thanks for stopping by, 

Charlotte


N.B. Please do not allow young children to play with this unsupervised as it will have not been made to CE standards and could cause injury to children under 3 years.